Thursday, July 6, 2017


Koli National Park in Finland: Great family adventure!


Last week we went to Koli National Park in Lieksa, in eastern Finland. This is a fantastic place not only for adult hikers and trekkers, but also for families with children! It is also a great place to enjoy the midnight sun in summer - long days mean plenty of time to see everything. And it is a national park, so visiting is free of charge. To get to the places described below, you'll need a car (and for one place mentioned, a rented rowboat).


We live in Finland where there's forest and lakes aplenty, so for us the the big draw was the unusual rock formations and great views. And we were not disappointed. Koli is a long rocky ridge that used to be a high mountain range, now all that's left is the hardest rock, rounded and smoothed by time and glaciers. 

It turns out there was much to see and do in Koli. First, we rented a holiday log cabin online. The cabin was located in the area known as Lomakoli, about 7 kilometres from Koli village center (where there's a shop to buy food and basic supplies) and 9 km from the start of the shortest trek to the outcroppings that are the most popular lookout spots with visitors: Ukko-Koli (Old Man's Rock), Akka-Koli (Old Woman's Rock) and Paha-Koli (Evil Rock). The cabin owner was helpful and even met us on the way to Koli to give us lifejackets for the rented rowboat.


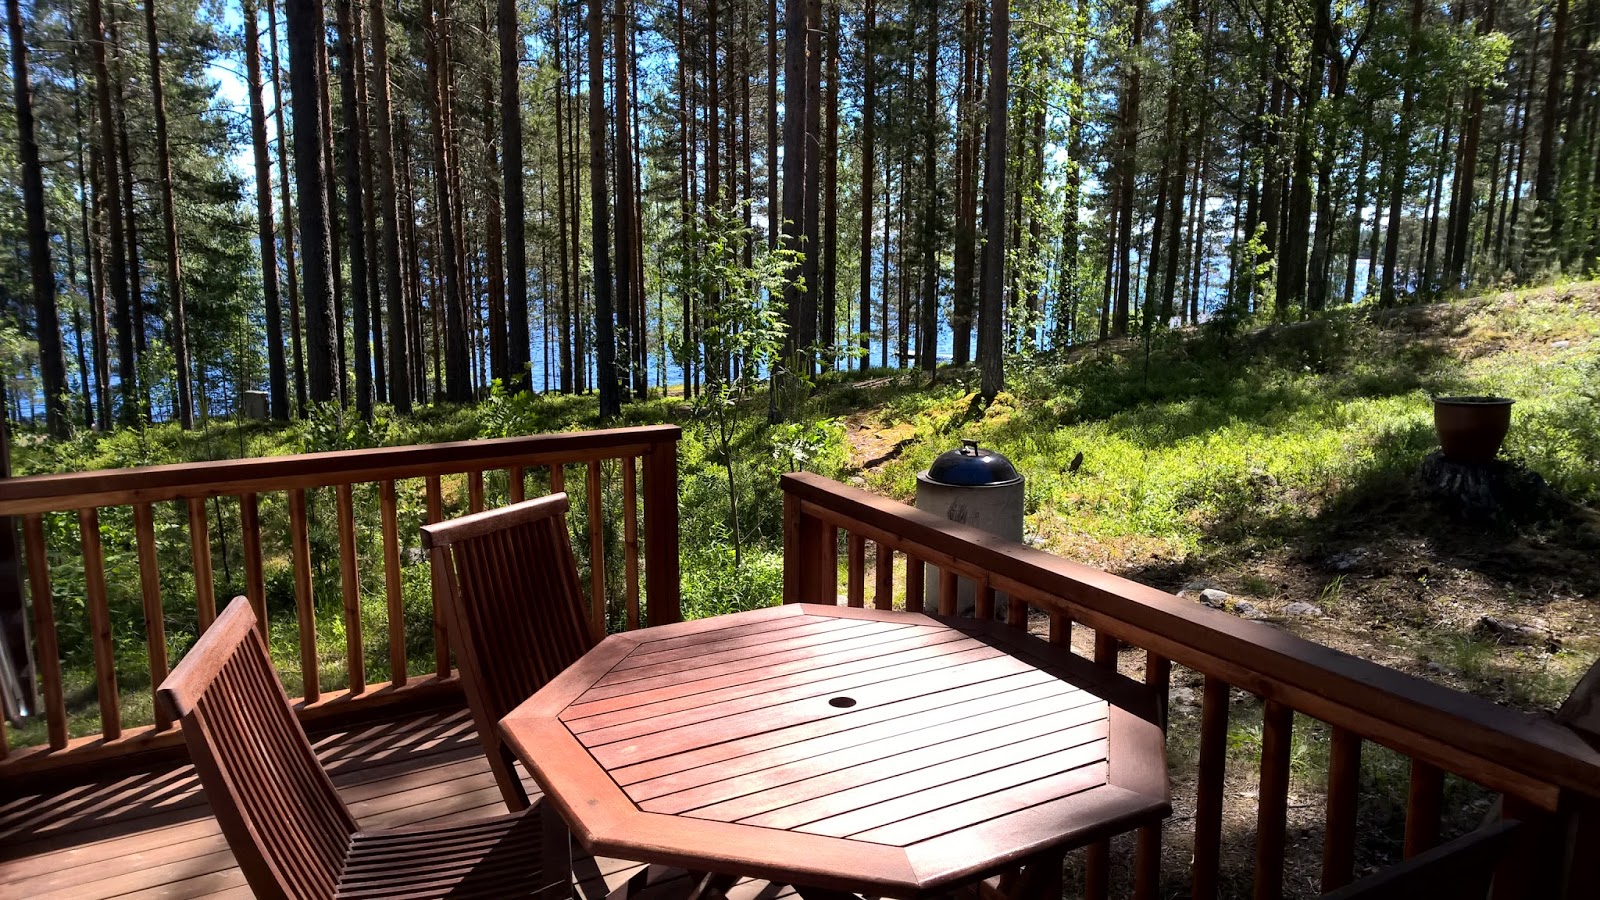
Although our holiday cabin was surrounded by other holiday cabins, it was very peaceful, with views of Lake Pielinen that was just a 70 meter walk down the path. There was a dock from which the kids could jump into the (admittedly cold) lake water and swim. Our cabin had a kitchen (with microwave, refrigerator, stove and dishwasher), indoor toilet, sauna, clotheswashing machine and drying cupboard (where you just hang your clothes, close the door and turn it on - it dries wet laundry within a few hours). All we needed to bring was our own sheets and towels. Cleaning services were included in the rental fee. The cottage also had a charcoal grill, that we used every evening!


What to do in Koli (our itinerary for 6 days):

Each of the excursions below will keep your family busy for 2-3 hours if you are staying in or near Koli village.


Day 1: Ukko-Koli, Akka-Koli, Paha-Koli (trail starts 3.5 km from Koli village, walk/climb is 1.4 km to the end of the look-out area)


This was a fantastic experience. You drive to the Ukko Luontokeskus/Sokos Hotel (3.5 km from Koli village center). From the upper-level parking lot there is a large elevator that takes you to the top of the mountain, where you start the trek. First, you climb up a flight of wooden stairs, then follow the (more or less) flat trail that leads to the different giant rock formations and look-out spots. Climbing up the stairs and (mostly smoothish) rocks requires a little effort for the less-athletically-inclined, but for our energetic children (aged 10 and 12 years old) it was no problem. Hiking shoes are definitely recommended. This was a lot of fun for all ages, as the bare rock formations and distant views over Finnish lakes and forest are definitely something out of the ordinary. Follow the trail forward, it takes you back to the parking lot.


Note to parents: many of the rock formations have gentle slopes on the other side that means visitors can't fall over the edge, but there are a few sheer drops where one has to keep an eye on the kids, especially smaller children, since there are no railings. But we saw plenty of families with smaller children here, and everyone seemed to be having a good time. Ice cream is available from the Sokos Hotel cafe at the start/end of the trek.


Day 2: Pirunkirkko (Devil's church, 12 km drive from Koli village center, 150 meter walk, then stairs down to the rock formations)


This is an interesting jumble of giant boulders which have formed a three-chamber cave at the bottom of a hillside. If you drive along Rantatie, you come upon a small parking lot with a tiny wooden sign pointing to a path through the forest. You walk for about 150 meters before coming to a metal staircase (with railings) leading downward. Follow it to the fantastic jumble of boulders and the Devil's Church itself. The opening to the 'church' is large enough for an adult to fit through (although a bit of a challenge for claustrophobics like me!) A flashlight is not necessary, because when you get past the first chamber the cave is open to the sky. The 'church' is fun for kids and perfectly safe, even if there are some other deep cracks nearby - formed by the fallen jumble of boulders - that are fun to look at, but you wouldn't want to fall into them!  


Day 3: Rowing to the Sand Islands (Hiekkasaaret)


The location of our cabin in Lomakoli meant that with 45 minutes of rowing in our rowboat, we could go to Hiekkasaaret (Sand Islands), which are a pair of uninhabited islands with some forest and sandy beaches and round rocks. Our kids enjoyed swimming at the island beach. A few other holiday-goers had arrived there ahead of us, but shared their bonfire spot with us as we grilled our Finnish sausages (wood for the fire is supplied for free in a woodshed at the end of the easternmost island, and there might be a woodshed on the other island also, not sure). There are also basic restroom facilities (no running water) on the eastern island. Bring water and food with you since there is none on the island, they can come in handy, especially if you're not a fast rower and find that the trip takes a bit longer than expected... 


Day 4: Excursion to Kaiskuniemi peninsula (11 km from Koli village, 4 km walk round trip to the end of the peninsula)


This wonderful secluded place is Finnish summer nature at its best. Drive north towards Hattusaari to Niinilahdentie, after Niinilahti you turn right, and keep going until you get to a tiny parking lot and a sign that says "Polku" (path). Walk 700 meters through the forest, after that you are on an esker ridge with views of Pielinen lake on both sides. Keep walking and you'll reach a place where the peninsula is just a narrow strip of rocks leading to the next forested, boulder-dotted esker (dry land to walk across if you are lucky, a shallow wade (15 cm deep max) across if the water level is a bit higher, as we found in our case - rubber flip flop sandals definitely needed for this!)


There were beaches in the final part of the peninsula to swim in, pretty round rocks, and apparently untouched natural forest. You don't have to walk all the way to end of the peninsula to enjoy this. Many thanks to a Finnish blogger for writing about this - it's not mentioned anywhere on the maps or brochures, and we never saw another person the whole time we were there. The place is truly a treat!


Day 5: Tarhapuro Waterfall (3 km from the Koli harbor, 1 km walk + climb up the rocks)


This was a pretty hike and well worth the climb to the waterfall over giant moss-covered boulders and gnarled tree roots (like a forest from a fantasy novel!). The climb was not very physically challenging but it was a bit difficult for those (like me) who don't have great balance. Having somebody more nimble to lend you a hand to the next rock can help. There is a sort of path up the rocks, but in some places you have to connect the dots yourself. Our kids had no problem with the climb. Even without climbing on the rocks, from the end of the path you can see part of the waterfall (and all of the gigantic boulders). Apparently the waterfall is bigger in the spring with the snow runoff, but even at the start of July it was still there.

Drive east from Koli village to the harbour (satama) and then south along Rantatie for about 2.5 km until you come to the Likolahti parking lot (on the right side of the road if you're driving south). From the road you can see a sign pointing to the path to Tarhapuro.


Day 6: Pieni-Koli (3 km from the Koli harbor, 1.5 km uphill walk from the Likolahti parking lot to the top)


This was a walk up the hill through a lush fern forest. At the summit, the rocky outcropping of Pieni-Koli (Little Rock) looks out across a small valley to the grey rock cliffs south of Paha-Koli. The slope was a little steep in some places, but easily accessible with hiking shoes, and our children had no problem with it. The hike was definitely worth it - at the end there are nice views and a giant boulder that our kids enjoyed sitting on.


Drive south 3 km from the Koli harbour (satama) and park your car in the Likolahti parking spot next to the road. Start walking back north past the lake on your right until you come to the small sign on the left side of the road pointing to the path to Pieni-Koli. Once on the path, on your right you will eventually pass an old green bench that has seen better days, then a look-out spot with a nicer bench. Keep going a bit further and you'll come to the signs that tell you to make a sharp left turn to Pieni-Koli: you're almost there!  


Things that you will need for your Koli adventure:


mosquito repellent

charcoal and lighter fluid for grilling, if you are renting a cabin and want to grill outdoors

Buy a detailed map of Koli National Park for 5 euros from Ukko Luontokeskus (Nature Center)/Sokos Hotel

Hiking shoes for everybody

A jacket/raincoat (Finnish summer weather can be variable)

water bottle

rubber flip-flop sandals for wading in lake bottoms (the rocks at the bottom of the lakes are usually not sharp, but they can be uncomfortable to walk on barefoot).


Keywords: perhe loma family holiday vacation Finland Karelia Karjala mökki cabin cottage hiking retkeily patikointi lapset children advice activities active rowing lakes

Saturday, October 5, 2013

Succulents, caudiciforms and air plants part 1


Here is an Echeveria agavioides of the new pink variety, just one of the many strange and wonderful succulents, caudiciforms and airplants that make their home on my living room window sill. Almost all of them were purchased on Ebay from plant sellers in different parts of Europe. The plants were mailed to me bare rooted (wrapped in newspaper, usually), but that does not bother succulents, which can go without water for weeks and still be quite healthy and happy when potted. Because of our dark Finnish winters, I bought a used greenhouse lamp on discount from www.viherpeukalot.fi and hung it above my succulents, and it seems to give them sufficient light, because they are still growing happily even though it has been very cloudy outside these past weeks. Succulents are used to desert conditions and very little water, so I use for all of my succulents a very porous mixture of 1/3 granite gravel, 1/3 baked clay gravel (Kekkilän ruukkusora) and 1/3 cactus potting soil (Kekkilän kaktus- ja kylvömulta). I also water them using rainwater or well water, since tap water has chemicals which will produce spots on the succulents (I've tried it). This echeveria is potted in a glazed pot, which is not the safest strategy (as I now know from experience), since these sorts of pots retain more moisture than unglazed pots and can therefore allow fungus to grow in the soil, killing the roots. But it's been more than two months now, and he still seems happy. I only water him when the soil is completely dry several centimeters deep.


Haworthias are some of my favorite succulents, and they are available in an almost endless number of varieties and hybrids. Here are (top) a Haworthia murasaki obtusa seedling, and (bottom) a Haworthia pygmaea x retusa v. multilineata seedling. Haworthias are very prone to root rot, and the H. murasaki obtusa was the first (and hopefully only) victim of my ignorance, because I planted him in a glazed clay pot. After a month or so I noticed that his leaves were starting to look dull and withered. Following advice received from the Internet I de-potted him, and sure enough, some of his roots had rotted away and there was clearly fungus at the bottom of the pot. I pinched off the rotten roots up to the healthy tissue, and even all the way up to the stem in one case (in total I removed about 1/3 of his roots), and left him in a cool, dry place for a week before repotting him, this time in an unglazed clay pot. Although his outer leaves will probably never regain their former plumpness, there are three new tiny leaves growing in his center which look quite healthy, so he is on the road to recovery! I have now planted all my haworthias in unglazed clay pots, where the soil dries out much more quickly. So far, no recurrence of root rot.


Above are several 'living rocks' or lithops: the green one at the top is Lithops sulfurea, the brown one on the left is Lithops lesliei ssp. lesliei v. lesliei, the lighter brown one on the right is Lithops gesinae v. annae, and the pink ones on the bottom (yes, they really are pink) are a family clump of Lithops dinteri. Like the split-rock plants or Pleiospilos nelii (see Terrariums post), these don't do very much, but they are cute. The Lithops gesinae v. annae tried to flower, but something went wrong and the tiny flower withered away before it could rise out of the crevice between the leaves. Lithops flower in the autumn when the amount of daylight begins to decrease, and I use an artificial greenhouse lamp for my succulents, so this lithop may have simply been confused and gave up. Like the Pleiospilos nelii, I water these lithops very sparingly, and their soil is almost always dry.  However, when lithops begin to flower it is important to give them more water.


This is a Titanopsis luederitzii, which is native to South Africa and Namibia. It normally grows in limestone outcroppings, where it blends in very well with its surroundings! I have now moved this one into an unglazed clay pot. So far he has grown extremely slowly, but seems to be doing fine. 


Here are two seedling-sized varieties of adromischus: Adromischus cooperi (top) and Adromischus maculatus (bottom). I have since repotted both in unglazed clay pots and they are growing slowly but surely, with new leaves appearing in the center.


This is a tiny Trichodiadema stellatum. Although it looks like a cactus, it is not, being a member of the mesembs family like lithops. This one is a fast grower. This photo was taken just after he arrived, and in just a couple of months he has already grown 34 times larger than this. I have read that trichodiademas are not as prone to root rot as some other succulents, and this seems to be true: he did most of that growth while in a glass container with no drainage. To be sure, I watered him very sparingly.


A caudiciform is a plant that stores water in its trunk or roots to form large tuber or caudex. This is a Fockea edulis, which I have read is one of the easiest caudiciforms to grow indoors. This photo was taken when the plant had first arrived by post, but his green vines have grown much, much longer in the couple of months he has been sitting on my windowsill. He is in a glazed pot, but I have watered him only when the soil is completely dry. Some caudiciforms go dormant in the winter if not supplied with artificial light. Let's see what happens to this one this winter.


Yes, it's alive! This strange plant is a Tillandsia paleacea, otherwise known as an 'air plant'. It needs no soil, because in nature it grows on tree branches, rocks, etc. and gets its water from rainfall and humidity. Air plants come from Mexico and South and Central America and exist in many different varieties. They cannot live without watering, however, and in Finland where the indoor air of many homes is very dry, they need to be watered frequently by immersing them in a bowl of water with just a little fertilizer added. Unfortunately, not all fertilizers have nitrogen that can be absorbed by air plants, and after some searching I finally found Neko Bonsai ravinne sold in Viherlandia that has the right form of nitrogen. I have been immersing the air plant fully in water with a little of this fertilizer every other day for 24 hours. After soaking in the water, it is important to put the air plant in a warm place (under a warm artificial light, for instance), so that it dries quickly and does not encourage fungal growth.  I have had this one for several months now and it has started to grow a baby or 'pup' on one end.  I have not been able to find any air plants for sale in Finland, and even on Ebay they are not easy to find. Even though air plants do fine being mailed by post, I've only been able to find two sellers in Europe who will ship them to Finland. Hopefully that will change in the future.


Saturday, July 20, 2013

Terrariums


Terrariums are miniature worlds combining the beauty of light through glass, living plants, and objects which are pleasing to the eye. For those of us who remember the terrariums of the 1960s and 1970s which were meant to be closed and self-sustaining (and therefore often damp and mildewy, with condensation blocking one's view of their interiors), the 'new terrarium' trend comes as a welcome innovation. My initial inspiration for the simple terrariums shown here was the excellent book Terrarium Craft: Create 50 Magical, Miniature Worlds, but many other examples of new terrarium ideas can be seen by googling photos on the Internet. The book Terrarium Craft gives more attention to the creative and decorative possibilities of terrariums than it does to their sustainability, but if one is willing to create simpler terrariums, longevity should not necessarily be a problem if one selects the right plants and gives them the right amount of water and light. Glass vases should be of clear (not colored) and not-too-thick glass to let in sufficient light and avoid excessive glare. Decorative objects can include rocks and seashells picked up from the beach, small ceramic or stone figures, or anything else that will not disintegrate after long exposure to water.

For the terrariums below, I used succulents (Finnish: mehikasvi) and glass vases purchased from Finland's largest nursery center, Viherlandia. Brief experience has already shown that roundish succulents with a rosette-like structure such as Aeonium, SempervivumEcheveria and even Aloe are harder to keep beautiful in terrariums than succulents with stem-like or rock-like structures such as Crassula, Pleiospilos, and Sedum because when they get too dry, the rosette-shaped succulents can start to lose their bottom leaves even before one notices it, and this detracts from their appearance. Succulents with stems tend to not lose any leaves right away, they just start to look droopy or their leaves look 'thinner', which gives you time to react and give them more water.

Succulents (and almost all other plants) don't like for their roots to sit in water, and so drainage is important. Put at least 34 cm (11.5 inches) of rocks, gravel, shells, or small broken pieces of ceramic pots at the bottom of the terrarium before adding the soil. Soil for succulents should have a some sand in it. I've mixed potting mix specifically for cacti with ordinary potting mix (which has less sand and more organic matter) because I've noticed that the soil in small terrarium containers can dry out fairly quickly, and the higher the sand content, the more quickly it will dry out.  If you want to have layers of substrate (i.e. stones, shells, sand, gravel, pebbles, etc.) which are visibly separate from the soil above them, make sure you put a layer of small bits of drainage medium like perlite (Finnish: kevytsora) as a filter in between your soil and the substrate (stones, sand or shells) below it, because otherwise the soil will just wash into your stones, shells or sand and they will turn a dark brown when you water your plant. Or at least the filter idea should work in theory. My filter of perlite seems to work so far, but over the long run the soil above may end up trickling down through the perlite into my substrate.

Update (October 2013): For many succulents, glass containers just won't work and they need unglazed clay pots (which 'breathe' so that moisture can leave them more quickly). Please see 'Succulents' post. 


In this photo, you can see the perlite (dark brown pebbles) layered between the soil and the white decorative stones.


This terrarium combines a small Crassula ovata (Finnish: rahapuu) with natural black and white stones from Shelter Cove, California.

Update (October 2013): This Crassula is still growing happily in this container.


A terrarium containing Sedum spathulifolium, Crassula perforata (the long one trailing out the mouth of the terrarium), and two unidentified Sempervivum-like succulents (the grey one possibly Echeveria?), plus two halves of a geode and a mussel shell.

Update (October 2013): This terrarium didn't make it. There was not enough air circulation for the amount of moisture needed for the plants, and fungus set in, rotting all the plants. I was able to save leaves from the grey Echeveria, and have successfully started ten new plants from them (see post Succulents, caudiciforms and air plants part 2).


Split-rock succulents (Pleiospilus nellii) scattered among real stones.

Update (October 2013): Nothing much has happened with these. I water them about once every 3 weeks .  


A close-up of Pleiospilus nellii showing the 'baby' leaves growing inside the 'parent' leaves. The baby leaves slowly drain water from the outside parent leaves, which then wither away into brown crusts. During this phase of their growth, the plants do not need water. So far, I have not watered these for three months and they seem perfectly happy. I have read that watering will only cause them to rot. They do need water in spring when flowering, apparently. 


A Sedum growing in soil above a substrate of perlite (kevytsora, the brown pebbles at the bottom) and round pumice stones found on a beach in the Azores.


A small Crassula 'Gollum' with split-rock succulents (Pleiospilus nellii). This terrarium posed a practical challenge: how to plant the Crassula and the Pleiospilus together, when the first needs water but the second should remain dry? After first putting in the perlite, I planted the Pleiospilus in a very small plastic pot, placed the pot carefully inside the terrarium, and then filled the rest of the glass vase around the pot with soil, into which I planted the Crassula. I carefully added a bit of soil to just barely cover the rim of the small plastic pot, which needs to be almost level with the soil so that water given to the Crassula cannot find its way to the Pleiospilus roots. Water is given to the Crassula through a syringe (like the kind used to give medicine to small children) so that it stays on the Crassula's side of the terrarium.

Update (October 2013): I had to replant these, since the Crassula 'Gollum' grew so fast that it outgrew the terrarium in no time. Crassulas like this are supposed to be prone to root rot, but I kept mine for nearly 3 months in glass containers with no drainage with no problem. It did get infested with mealy bugs, and is now in a clay pot.


This terrarium with a small Aloe and Sedum was planted by my 8-year-old daughter. The green color in the middle of the container is moss which started to grow after the terrarium was planted, but it just adds a nice splash of color, in my opinion.

Update (October 2013): This one is still growing happily.